Monday, January 30, 2012

Thanksgiving - Bread, the Staff of Life

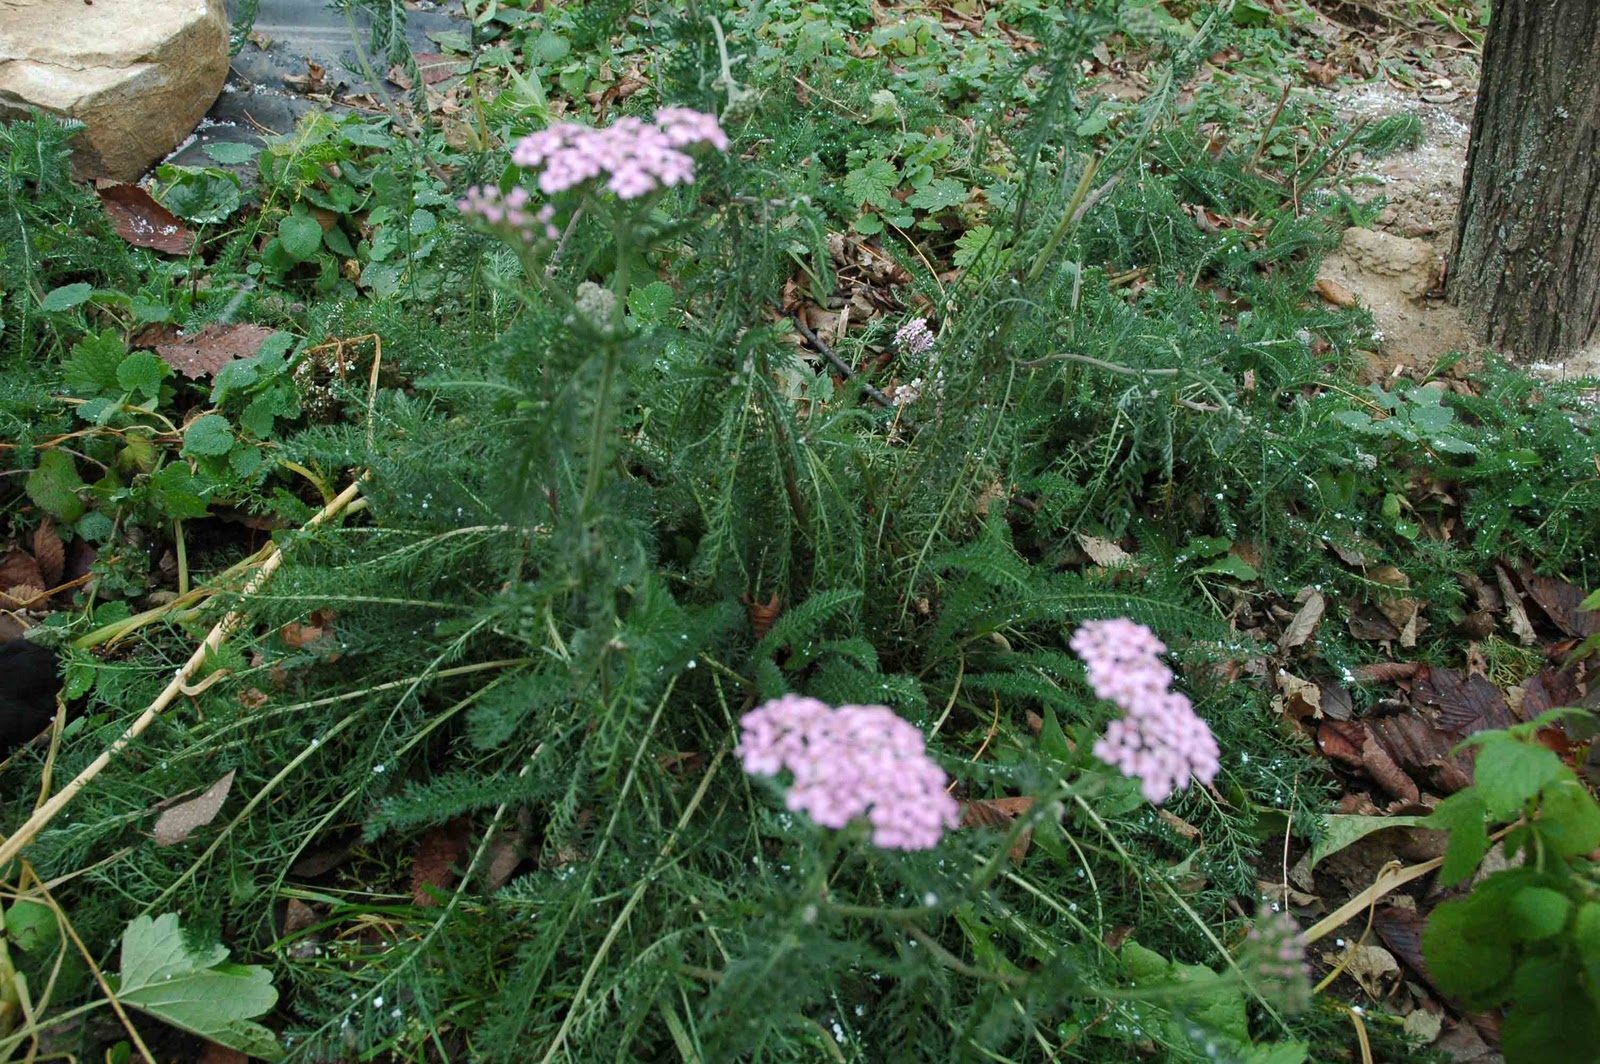
A basic sourdough bread and
crescents converted from a standard recipe.
       I mentioned in a previous post (Thanksgiving - Before the First) that during the middle of the Seventeenth Century, the average Englishman might eat two pounds or more of bread every day. For him, it really was the staff of life. Did the Pilgrims have bread for that first Thanksgiving? No. The seeds they brought with them failed to grow and thrive. They may have had some sort of unleavened corn bread, but even that is questionable. More likely, the corn was hominy served as part of a stew.
       I have always assumed that that average Englishman dined on a fat loaf of bread easily broken apart by hand and used to mop up every last lick of gravy from his stew pot. I have discovered that vision is wrong. The process of grinding wheat was expensive. Baking it required a stone or clay oven especially made for the purpose. The leavening and baking took hours. Only the wealthy could afford this. Only the wealthy could afford "white" bread. The darkness of your bread was an indication of your financial and social position. The poorest people ate dark whole grain flat breads. Ironically, these were much more nutritious than the lighter leavened loaves favored by the rich.
       Few people had a home oven back then. The clay or brick oven had to be preheated with a wood or coal fire, then the loaves were added and the oven sealed. By the time the oven cooled, the loaves would be ready. It was the rare household that could manage to do this on a regular basis. More commonly, the bread was started at home and sent out to be finished at a local bakery.
       The bakery would have been located outside the town because such places were inclined to explode. At the time this was attributed to demons, but we know now that fine flour particles in the air reacted much like a gas to flame and were ignited by the cooking fires. It looks to me like being a baker in old England was a hazardous job!
       Today we commonly think of bread as made with wheat flour. Medieval man might just as well have had rye or barley or some other grain. I would imagine that a smart landlord would order the planting of more than one grain crop. If a crop failed, there would be no truckloads brought in from hundreds of miles away. People would starve. The Irish potato famine comes to mind. This didn't happen until 1845, but is a perfect example of what happens when a population relies on a single crop.
       Medieval folks didn't pick up a supply of yeast at the grocery store. Modern commercial yeast didn't exist until around 1900. The granular form most of us use today was developed by Fleishmann's during World War II. Instant yeast came on the market during the 1970's. Way back then, they would have used a sourdough starter for leavening.
       Unlike granulated yeast, there's nothing remotely new about sourdough starter. Because it played such a colorful role in the history of our old west, many consider it to be uniquely American, but the Egyptians appear to have been the first to use it. The Greeks taught its use to the Romans. The Romans spread that knowledge across Europe. I admit to being intimidated at the thought of using sourdough, but this stuff crossed the continent in covered wagons and continued to leaven bread the entire trip and beyond. How hard can using it be?
       Let me back up a step here. You've never heard of sourdough stories from the old west? About the "hooch" generated by sourdough? That's the alcohol that rises to the surface in a sourdough pot, perhaps another reason why sourdough was popular among prospectors! This stuff had other uses too, as a glue and as a shoe and brass polish. Remember this if you try leavening with sourdough and do not use metal containers!      
       Sourdough starter was a by-product of beer production. Hundreds of years ago it was a common practice for bakeries to get their starter from a brewery. Or they could have caught their own wild yeast much as you could today. This is not the easy way to get your own starter, but you might want to try it to see if you can make it work, another experiment that may make you more appreciative of today's conveniences.
       To attempt to catch wild yeast for a sourdough starter, mix 4 cups unbleached white flour, 2 teaspoons salt, 2 tablespoons honey, and 4 cups water from boiling potatoes, all at room temperature, in a non-metallic container large enough to allow for double to triple expansion.  Cover the container loosely (I suggest several layers of cheesecloth so yeast can enter) and set it in a warm place for two or three days. Eighty-five degrees is ideal, ninety-five is too high. You could try doing this in your kitchen if you bake a lot and may have yeast floating around, or you can go crazy and try it outside where the yeast is truly wild.
       After a few days your mix will have started to froth, expand and smell sour, or it will be molding and stinky. If the first happens, your experiment has been a success and you have a starter. Stir it down and store it lightly covered in the refrigerator for a few days, then try using it in a sourdough recipe. There is no guarantee that you will like the taste. Not all yeast produces a desirable product. Try this, or wait for my next post, where I'll present some other options regarding sourdough starters and well as information on using it.

Note: Check out Pinch my Salt (November 2011)for a different, more detailed procedure for starting a sourdough starter from scratch!
   

Saturday, January 28, 2012

Sugar Beets to Molasses - Continued

Brown sugar on a spoon. Yum! 
       This post is a followup for Sugar Beets to Molasses - Homestead Style that I published January 10th. If you haven't read that, you may wish to do so before continuing here.       Compared to homegrown, home-processed molasses, the store-bought stuff is tasteless. Like me, you have probably observed this regarding most everything homemade. Much of the syrup resulting from cooking my sugar beets has gone to topping pancakes. I wouldn't even consider store-bought molasses for this, the taste is so different. I've used both syrup and the brown sugar in baking with good results. The sugar remains much moister than commercial, but the taste is superior.
        This was an interesting experiment, but time-consuming for the amount of finished product, and a few weeks ago I became concerned about the possibility of loosing some of that product due to molding. I reasoned that since jelly is full of sugar and molds, molasses could do the same. I considered (briefly) canning some of the syrup. I may consider this again next year with another crop of sugar beets. I'm sure this would stop mold but it would probably reverse the crystallization just like heating honey will. On the other hand, my instructions say that further cooking will speed crystallization. Since I had much more molasses at that point than brown sugar, I opted to try cooking some down to see what happened.
Sugar beet syrup resembling chocolate pudding,
at a full rolling boil.
       In the previous post about transforming homegrown sugar beets, I warned about the danger of burning the syrup once the full rolling boil stage was reached. That danger is more real than I imagined.
       With about two inches of syrup in the bottom of my four quart dutch oven, I brought the syrup to a boil over medium heat, stirring often. At full rolling boil, this small amount had to be watched to be sure it didn't spill over the sides. I lowered the heat and continued to cook and stir until syrup slowed to a crawl when dripping off a wooden spoon held above the pot for a few moments. Having no idea how much"further cooking" was needed to speed crystallization, when it resembled chocolate pudding, I poured most of the syrup into a wide-mouthed jar, leaving maybe a half inch of syrup in the pan. I turned my back for a moment to make a note for this post. It was only a for a moment! But by the time I looked again, the syrup had turned black. I stirred it for a few minutes, hoping it wasn't as badly burned as it looked, but since it resembled tar in color and viscosity I had to admit that it was ruined.
To be or not to be (used, that is).  The larger jar holds the
"pudding." The smaller is cleanup water.
       Not one of my finest moments.
       But this was an experiment and I learned that one is better off being patient with the crystallization process. After nearly two months the process is still on-going. Based on this experience, I do not recommend cooking beyond the full rolling boil stage. Even the syrup I cooked to the pudding stage has a slight burned taste. I think it's salvageable, but will wait a while to see if it actually crystallizes. After three weeks, there is no sign of this, nor is there any molasses in this batch. It's too thick to pour and too viscous to even spoon out of the jar.
       Cleaning the pot and utensils is easy with plain hot water, which, considering the value of every teaspoon of this stuff, you may want to save for sweetening drinks or even for baking. Hot water on a cloth works for cleaning the stove and other surfaces too. As when working with any boiling substance, especially ones containing a high sugar content, use caution. Burns from this sort of thing can be particularly nasty.
      Is this worth all the effort? Only you can answer that, but keep in mind that 95% of all sugar beets planted in the USA are genetically modified. If you want to be sure you are using a non-GM product, you may have to find heirloom seeds, grow them yourself, and process your own molasses and brown sugar.
       If you think this blog is interesting and may be of help to you, please leave a comment to make me feel a little better about burning my syrup!
    

Tuesday, January 24, 2012

Thanksgiving - Before The First

What did Europeans eat before Tomatoes!
       Instead of answering all my questions, research concerning that first Thanksgiving has only raised more. In particular, I realized how little I know about the background of these people who journeyed so far–and are remembered with so many misconceptions. Yes, they came to the New World so they could practice religious freedom, but they weren’t interested in anyone else’s rights in this regard, only their own. Their clothes were more likely burgundy or purple than black. The big buckles on shoes and those big white collars we all learn about in grade school were added by artists much later to symbolize quaintness. They worked hard, but they played hard too. And not all those who landed from the Mayflower were Separatists, or what later became known as Pilgrims.
       These Separatists were not peasants, but educated people free to leave the land. Some were even college graduates. Most were "tradesmen." From what I’ve read, I’d say they were intellectuals and businessmen rather than farmers and craftsmen. One hundred, two colonists landed in Massachusetts in 1620. Seventy-three were male, but 32 of these were under-aged and eight were hired servants. Twenty-nine were women. Eighteen of these accompanied their spouses. The rest were younger, unmarried, accompanying their parents. Some of these under-aged people were infants.
       The voyage must have been pure hell. The Mayflower was a cargo ship, ill-equipped to hold passengers in addition to its crew of thirty. The voyage lasted 66 days, with a diet of salted beef and hard tack (dry biscuits). Even this poor fare become inedible before the ship reached land. When the water supply became contaminated, the only alternative was beer. Cooking was limited by foul weather and the use of charcoal in a metal box rather than a genuine stove. There was little enough room for people, let alone supplies. The women brought what they would need to cook at their new homes. Men brought their weapons, and tools and seeds for farming. I found only one mention of livestock and that was goats. The passengers brought aboard some dried peas, beans, cheese, and butter, but I found no information on how much "some" was or whether this was eaten, spoiled, and saved until landfall. I expect the first two options apply.
       The ship landed in November. Illness struck soon afterwards. Housing was not ready for everyone until four months later. The entire colony would have perished if friendly Indians hadn’t helped them.
       One can see why they wanted to celebrate their good fortune at having survived until the fall of 1621. But this raises the question: how did their diet in the New World compare to what they might have eaten back home? Have you ever wondered what Europeans ate before they discovered tomatoes and potatoes?
       You’ve probably seen paintings depicting banquets during the Middle Ages: people slobbering over the food and tossing bones to dogs gathered for their share of the feast. Again, artists have taken liberties with truth. Research tells us that a table set in those days would pass in a modern home. I find this a little hard to swallow whole, but I wasn’t the one who did the research. Meat was scarce and expensive and many had it only on special occasions. The choice, however, was less limited than ours. One list of options included starlings, vultures, peacocks, capons, dog fish, porpoises, seals, whale, hedgehog, lamprey eels, crayfish and oysters. Hunting deer, rabbit, hare, and boar was a privilege of kings and the penalty for pouching was death or lose of a hand. Vegetable choices were cabbage, turnips, parsnips, carrots, garlic, onions, leeks, sorrel, peas and beans, with fruit available seasonally. Spices commonly available (at least to nobility) were nutmeg, cloves and cinnamon. Then, of course, there are the flowers and herbs (like borage, purslane, stinging nettles and dandelions) that came to us from Europe because they were food, but are not even mentioned in the sources I read.
       All this was available, but what did the average person eat on an average day?
       As now, the answer to that depended largely on one’s financial state. A prosperous peasant might consume two to three pounds of bread a day; eight ounces of fish, meat, eggs or cheese; and two to three pints of ale. Meat, though, was an exception rather than the rule. For vegetables he would likely choose from onions, leeks, cabbage, garlic, turnips, parsnips, peas and beans. All in all, he ate healthier than most modern men, except that their vegetables were almost invariably cooked because eating raw veggies was considered unhealthy.
       Here are three examples of daily food consumption.
1. Three eggs, three cups of oat porridge, three pints ale, eight oz cheese = 3500 calories.
2. Two cups beans, two pounds whole wheat bread, three pints ale, four cups turnips = 4350 calories.
3. Eight oz pork, two and a half pounds rye bread, three pints ale, two cups cabbage = 4000 calories.
       I’m going to get in trouble here because I can’t find the website where I got this information so I can give credit. I hate it when that happens.
       Recommended daily calories for a modern man is about 2000 calories, but in Medieval times a man often worked a twelve hour day of hard labor. He would have starved on 2000 calories. I’m assuming that available foods remained largely unchanged from the Middle Ages until discovery of the New World and all its bounty, so the Pilgrims might well have been used to eating like this. In some accounts of early settlements I’ve read, the colonists starved because they were surrounded by food they did not recognize as such. That might have happened to the Pilgrims too if it hadn’t been for Squanto and other helpful folks.
       When I started this project I never expected to delve so deeply into history, which I find much more interesting now than I did in grammar school, perhaps because I can relate better to the colonists' problems than I could as a child. That you've read this far suggests that you share that interest to some extent. If so, please leave a comment to fuel more posts!

Sunday, January 22, 2012

Thanksgiving - Maize (or Hominy)

Acrylic painting, 2x3 feet, by author
        When most of us think "corn," we mentally picture yellow ears or kernels, drenched in butter, filled with "milk," tender and easy to gnaw from the cob. There are now over two hundred varieties of sweet corn, but in 1621 sweet corn did not exist. All the Pilgrims found upon arrival in the New World was maize, bright-colored and completely alien to their experience and palates.
       The settlers arrived in the New World in November, too late to plant anything, too late to build shelters for everyone against the coming harsh winter. The one structure they did put up, burned down in January. Many were forced to live on the cramped ship that brought them; there was no place else. Log cabins hadn’t been invented yet, and lumber and labor were scarce. During that first winter sickness took over half the new arrivals. Children were among those who survived, further limiting the available work force. The entire settlement would certainly have perished if not for the intervention of a former Indian slave.
       Squanto had been taken to England as a slave and later granted his freedom, but when he returned to his home, he found that his entire village had died. Instead of hating the race that had taken him from his family, he taught the settlers how to plant and cultivate corn, how to use fish to manure it, and how to find other provisions. They tried planting wheat and some other English seeds, but all those crops failed. Corn was their salvation.
       But the way they prepared and ate it differs from our vision. You could have broken a tooth trying to chew Seventeenth Century maize. Squanto showed the Pilgrims how to soak it in water that had been run through ashes. This caused the kernels to expand and break the hard shells, creating hominy, which could be eaten as a cereal. Dried, it was ground into meal, or ground finer into flour. They learned to use it in puddings, bread, soups, stews and mush, and eventually, for livestock feed, mattress filler, and a source of heat.
       As for the yellow field corn we know today, it wasn’t developed until the last third of the Nineteenth Century. Sweet corn is even more recent.
       The corn that saved the Pilgrims and made the first Thanksgiving possible is now grown nearly exclusively as an ornament. Ask almost anyone about eating it, and it is likely they will tell you it’s inedible. I question that since I’ve grown and ground some myself for cornmeal.
       Recipes for preparing sweet corn abound so I won’t include any of those here, but how about directions for making hominy? The process, I’ve read, makes corn both more nutritious and tastier. It’s unlikely that you’ll win kudos if you include this at your traditional Thanksgiving dinner, but you might want to try it as an experiment to gain more appreciation for the corn we know and love today, or simply so you’ll know how it’s done. I found a site that describes the process, http://howtomakehominyfromcorn.com, but the directions printed out to five pages, four more than I’d want to include here. The author says his first few efforts to do this himself failed, so I’m not comfortable giving you a shortened version. No, I have not tried this myself.
       Among the references for writing this was William Bradford's History of Plymouth Colony.

Thursday, January 19, 2012

Thanksgiving - In the Beginning

Acrylic painting of Indian corn, 2x3 feet, by the author.
       Have you ever wondered what the first Thanksgiving was really like? What did the Pilgrims and their Indian guests eat? How does what they had compare with a modern feast? How would you prepare a modern feast if you had to start from scratch?
       Why think about this now, in January? Pretend you can't simply visit a supermarket to buy the fixings for a traditional Thanksgiving dinner. Pretend you'll have to grow whatever you want to serve for that occasion. What would you grow yourself? That's why now is the time to think about Thanksgiving. Now is when seed catalogs show up in your mailbox and you make plans for the summer. Of course most of us will not literally grow everything we'll consume for this holiday, but thinking about it in this manner could be a real eye-opener. A simple pumpkin pie becomes a major operation--and a genuine treat. I think that looking at the feast day in this light will make me more thankful for the ease of preparing the traditional meal as well as providing some useful information in self-sufficiency. I'll be exploring these questions and sharing what I learn here.
       First a little history. Everyone knows the first Thanksgiving was held in 1621 in Massachusetts as a religious holiday.
       As is so often the case, what "everyone knows" is questionable. San Elizario, Texas claims the first Thanksgiving was held there in 1598, and another claim comes from a plantation in Virginia for a 1619 "first." In addition, the Massachusetts event was a community harvest feast for the 53 surviving colonists and 90 Indians. Without the help of those friendly Indians, the entire colony probably would have starved. Even so, the Indians would not have been invited to a religious event, which would have been a day of prayer, not three days of gluttony. Unlike the modern-day feast, the 1621 one was not family oriented like it is today. Had it been, again, the Indians would not have been included. Nor was the 1621 event repeated annually. The next Pilgrim feast wasn’t until 1676, held in June. By this time the settlers weren’t getting along with the indigenous folk and they weren’t invited.
       In1863 President Abraham Lincoln declared Thanksgiving a national feast day. Before that it was not celebrated outside of New England. Now we can’t think about Thanksgiving without thinking "Pilgrims" but Pilgrims were not even linked to the holiday until late in the nineteenth century. It wasn’t until 1941 that the holiday received Congressional approval for national observance..
       Today turkey is traditional for Thanksgiving. There is no conclusive evidence that the first Thanksgiving included this meat. "Turkey" to the Pilgrims meant any wild fowl. One reason it may have gained favor as the meat of choice is that Ben Franklin advocated this noble, sharp-eyed bird as the national symbol. (Hard to credit, but true.) The feast most assuredly included venison, and probably fish, shellfish, clams, ducks, geese, swans, berries, fruit, peas, pumpkin, beets, beans, maybe onions, and maize.
        They had no flour for pie crust or bread, unless it was cornbread. The corn they would have used wasn’t the yellow dent we are familiar with now. It would have been multicolored Indian corn, with kernels as hard as rocks (almost).
        The Pilgrims had no domestic cattle to provide milk or butter. Europeans still considered potatoes poisonous. Pumpkin was probably peeled, disemboweled, cut up and boiled like we would potatoes. The phrase "American as apple pie" hadn’t been coined as apples were still an alien plant at that time. If they ate cranberries, it would have been as dried fruit, not the sauce we know. Sweet potatoes were found only much further south.
       I’ve already posted about growing your own grain for baking purposes, raising sweet potatoes, and processing sugar beets. Raising livestock for dairy products, eggs and meat is beyond the scope of what I intend here, but that is something you will want to consider if your goal is self-sufficiency. I’ll be exploring other ways to start from scratch for a truly homemade Thanksgiving feast in future articles. Subjects I expect to cover include corn, pumpkin, cranberries, potatoes and sourdough. I’m not an historian or even a famous cook, but this is a subject that I find intriguing and I simply hope to share what I know and learn about preparing for Thanksgiving throughout the year.
        Related posts:  07-24-11  Sweet Potatoes - The Edible Ground Cover
                                08-24- 11  Growing Your Own Wheat for Baking
                                12-17-11  Victorio Grain Mill - Product Trial
                                01-10-12  Sugar Beets to Molasses - Homestead Style

Tuesday, January 17, 2012

Go Thru This Seed Catalog and

     
        Shortly after the new Richters seed catalog arrived a few days ago, my spouse handed it to me along with a highlighter and told me to mark what I want. Good grief, after all these years he should know better than to do a thing like that! I went through the catalog all right, but I didn't mark my choices right away because I knew I'd want far too many. My initial list is a full handwritten page.
Yarrow.
       I have to consider costs here, especially since some of these plants are said to be difficult to start from seed and plants are sooo much more expensive. Then there’s the question of time and space for starting so many plants as well as the work of setting them out in the gardens. I should select only plants that will work in the projects I started last summer or that I’m planning now. No "that sounds interesting" plants that I have no place I want to put. So let me see if I can whittle this list down.
       Bergamot/Bee balm. Attracts bumble bees, but not honey bees. Red flowers, medicinal uses, aromatic, teas. Likes sun, but takes some shade in hot climates. Divide or take root cuttings in the spring, stem cuttings in the summer. I visualize patches of this in the fruit guilds.
       Bugle. Low growing, creeping perennial, purplish foliage, four to six inches height, zone 6. Oops. We’re in zone 5. Likes partial shade, medicinal uses, not edible. Great for edging and rock gardens as well as ground cover. Ajuga genevensis is a taller variety that likes shade. A. replans is common bulge. I’m so desperate for ground covers that I want to try this even if it is listed as zone 6.
       Calendula. Continuous bright flowers if deadheaded. Medicinal and culinary uses. This self-seeded some last year, so maybe I can get away with a pass on it.
       Double chamomile. There’s a saying regarding chamomile that "the more it is trodden, the more it will spread." Sounds invasive, but it is also said that this plant will aid plants growing nearby. Full sun, can aid in speeding composting, an infusion spray will prevent damping off. It’s an insect repellent when sponged on skin, and has medicinal uses. This can go in guilds too.
       English chamomile. Chamomile nobile "Treneague" is a non-flowering variety used for lawns. I’d like to see how this does as a grass substitute.
       Evening primrose. For the moon garden! Full sun, long flowering season, medicinal and culinary uses.
       Lovage. Full sun to part shade. Self-seeding, culinary, medicinal, tea. Six feet tall, hardy, to four or five feet wide so few plants needed. Best to sew in late summer, divide every four years. Need fertile soil, heavy mulch. For the guilds. I need some taller plants.
Black locust stumps wrapped to discourage growth,
surrounded by frost-killed nasturtiums.
       French marigolds. Interplant with roses, potatoes and tomatoes. Said to control insect pests and certain weeds. Cut flowers, pleasing scent. I grew somelast summer and was impressed by the size of the plants and the number of blooms. I don’t know about the insect and weed control, but I want them again, along with Aztec marigolds, which have the same properties and are also rich in lutein (and a good addition to chicken feed).
       Nasturtiums. I love nasturtiums! They grow in the shade, in poor soil, the flowers, seeds and leaves are edible, attract beneficial insects, provide habitat, and living mulch. I have some seeds left over from last year and expect some self-seeding from last year’s crop, so I can pass on these.
       Pyrethrum. Natural insecticide that is non-toxic to mammals and is nonaccumulative. Likes alkaline soil. Cut flowers, 2 feet tall, daisy-like. Hard to start from seeds. Good to have on hand, so I’ll put in for a plant or three.
       Dog Rose. This sounded interesting in the catalog, but with further research I find it is a potential invasive species like multiflora rose, with the addition of being a climber with sharp, hooked prickles. Pass!
       Creeping speedwell. A low growing perennial ground cover that prefers shade. May escape into lawn. Okay! Sounds very interesting.
       Sunflower. The one that sounds most interesting in the catalog is supposed to have extra-large seeds for eating. I’m picturing the stalks as a barrier along side one of the guilds, perhaps interplanted with climbing nasturtiums. I’d be interested in hearing if anyone has tried something like this and how it worked.
       Tansy. Repels ants, roaches, flies and mosquitoes. Used as a meat preservative before refrigeration. Two to three foot tall stems with fern-like leaves. Only the leaves are used medicinally. This is strong stuff that has been used to cause abortion so use sparingly. Difficult to start from seeds. I’ll try a plant or two.
       Visnaga (honeyplant). Ammi visnaga. Medicinal for muscle spasms and bronchial asthma and some other applications. Member of carrot family. I want to try this one, but I’m concerned that it could turn out to be another Queen Anne’s lace.
       Silver King Wormwood. A. ludoviciana "Silver King." White flowers and silver foliage. Medicinal uses. A weak tea made from some wormwood can be used as a garden spray to discourage slugs and aphids, but the spray can retard plant growth if overused. Another perfect choice for the moon garden.
       Yarrow. Like tansy as repellent, aid to other plants, and compost helper. This stuff grows wild around here so I’d probably be better advised to dig up some of that and transfer it to the guilds.
       I eliminated a few! For the rest, the potentials I see here make me more eager for spring. (On the other hand, I’m looking forward  to the relative inactivity of the next few weeks.)
       I’d welcome comments and advice on these selections, or on other plants you might recommend after reviewing posts on my gardening goals and efforts


Saturday, January 14, 2012

Lawnless Progress 2003 to 2011

       Winter weather has finally descended with seasonal chill and snow here in Michigan. This puts a temporary hold on my efforts to cut down on the lawn area in my yard. Reviewing progress helps me deal with the frustration of winter inactivity. 
       When we moved here in 2003, I had no idea I would one day embrace the mission of converting the huge lawn to something more attractive as well as more productive. Even so, I knew I would be making many changes and took photos to help me remember what the place looked like at the outset.
Our 160 years-old farmhouse as it appeared in 2003.
       Several little things have changed since this picture was taken. The large rock on the right has been moved to the path bordering the herb garden, which I put in in 2006. The cement steps leading up to the front door now lead down into the rose garden in the backyard, finished a year or so later. Bigger changes include a rock garden around the flagpole and a u-shaped drive swinging from the left, along the front of the house, then down to the road, which is behind me as I snapped the photo, and the evergreen garden, which fills most of the shaded area in the 2003 photo.
       The biggest change has nothing to do with lessening lawn space. I refer to the addition of the front porch that extends across the entire front and includes a front room addition that extends out from the old porch to the left of the concrete steps.
Front yard viewed from the porch, 2011.
       In 2011, all that remains of the front lawn is a band between the evergreen garden and the circular rock garden. Both the east and west sides of this grass area are edged with daffodil bulbs that I dug up from elsewhere in the yard this past summer. Hundreds of them. I read that they will create a barrier to grass, helping to keep it out of the gardens. I'm skeptical, but the blooms should be outstanding come spring as I selected the biggest bulbs for this project. 
       The area of dead grass in the middle ground will host something else come spring. Don't know what yet. Perhaps sweet potatoes, wild strawberries or creeping thyme until my budget or imagination comes up with alternatives.   
       My plan is for wild strawberries and cinque foil to fill in as ground covers in the evergreen garden in the background. These plants are in place, but they have a big job ahead of them. I've seen a front yard filled with these two plants so expect great things of them.
       This section of the front yard is the only area on the entire property that is approaching being "finished," and I'm pleased with the way it's going. It's not permaculture, which is my goal for some areas of the yard, but this is, I feel, a vast improvement over nothing but grass, grass everywhere! I like some grass as a place for grandchildren to kick a ball around or to put up a badminton net, but that's about it.
       My son's Christmas gift to me was a copy of Gaia's Garden, which I'm studying and devouring for information and inspiration. What a cool way to wait for spring!
      

Friday, January 13, 2012

Medical Emergency Preparedness?

       More than a month after "showering" in boiling water, I'm still limping around on a foot sporting third degree burns. The first and second degree burns on abdomen and legs have healed, but are still pink and may be so for the rest of my life. The experience isn't one I long to repeat, but talking about trauma is supposed to be therapeutic. I haven't attempted a blog on the subject before now mainly because I have no wish to gross anyone out, but there are some aspects of this experience that I think are worth sharing. I'm thinking emergency preparedness here. Would you know what to do in a similar situation? 

       After spilling the water, my first reaction was to get out of the area puddled with boiling water, then get out of the clothes and into the shower to cool the burns with cold running water. This is basic first aid. I would have known to do this even without my husband's coaching. I've never experienced trauma like this but have heard that when you're seriously injured, your body doesn't transmit the pain to your brain immediately, giving you some time to deal with it before pain incapacitates you. While in the shower I (foolishly) said to my husband, "This is going to HURT later, isn't it?"
One month after the accident. The worst burns
are to the right on the middle toes.
    Even as I stood in the shower, watching blisters grow and burst, starting to shiver from shock and cold, feeling nauseous and light headed, my husband was calling for an ambulance. The closest one is seven miles away, and should have been here in less than ten minutes, but that one was unavailable. Its backup was thirty minutes away. Thirty minutes! The 911 operator refused to contact the next nearest service because that didn't follow "protocol." No way could we wait! Riley drove me to the hospital. By the time we got there, I was in so much pain that I could hardly string two words together, let alone think coherently.
       They gave me morphine for the pain. I expected it to send me into a blissful, pain-free state. Okay, so I don’t know much about pain meds, never having needed them before. What it did do was make the pain manageable. It also made me nauseous and lightheaded. Morphine makes most people feel warm. This is a symptom of an allergic reaction that I didn’t notice. I was cold because the staff didn’t want to cover the burns until they were cleaned and treated, which couldn’t be done until the doctor gave the go-ahead and the meds took effect. The doctor’s go ahead was delayed because she had to fill out federal forms before treating her patient. Ironically, one of the dangers of burns is hypothermia; this is one of the reasons one you put dry bandages on burns.
       There was talk about sending me to the burn center at Michigan State in Ann Arbor because of the large burn area. There was also talk about sending me home. I didn’t want either, and was put in a room for observation to see which option was best. The next day I was admitted at the small hospital where I’d gone to the ER room and my regular doctor pooh-poohed the idea of going to Ann Arbor. During her morning rounds was when I got my first glimpse of my right foot. The blisters were huge, gray growths that looked like some sort of alien fungus. Unlike blisters elsewhere, they remained intact. The doctor said to leave them unbroken as that way they would remain sterile longer. I was still on morphine and feeling very little discomfort, except for continuing nausea. By noon the morphine was pretty much out of my system and I was taking only Tylenol. The nurse was urging me to get up and move around. I was released the next morning after my spouse received instruction for changing the bandages. I was appalled to learn that I'd gained fourteen pounds while in the hospital, from fluids to replace those lost from the suppurating wounds.
       I was delighted to be home instead of going to Ann Arbor, except that meant dealing with the dogs. Sam especially missed his mommy and was all over me, especially tending to step on that foot! It’s kind of amazing that the blisters didn’t pop until a day or two later. Even then there wasn’t much discomfort. That came two or three weeks later in the foot, after everything else had healed. The burns on my foot are deeper than elsewhere. Sometimes it feels like an electric volt is passing through the burned area, but it’s not a constant thing. I theorize that I was so focused on the burns on my body that the ones on my foot didn’t get enough cold water treatment immediately following the accident. Or maybe more water hit them. Anyway, I still can’t wear shoes even though those burns are healing well.
       The entire incident has opened the question of what would happen if professional medical treatment hadn’t been available. Raw honey is supposed to be an excellent treatment for burns. We don’t have any on hand. How would I have dealt with the pain? How about a supply of bandages for emergencies? Riley says one of the best sources for this sort of information is Backwoods Home’s anthology "Emergency Preparedness and Survival Guide." Do you have basic first aid training? Do you know how long it would take for an ambulance to reach your home under even the best conditions?
       Without immediate treatment for my burns (getting into the shower), I probably would have wound up as a major burn victim at the U of M burn center. That’s scary. Professional care is terrific when available, but when it isn’t right there, right now, it’s the individual’s responsibility to see to his/her own needs. How prepared are you?

Thursday, January 12, 2012

Blueberry Cheesecake

        I like to play with my food. Some folks will call what I do "cooking," but that sounds like work and coming up with preparation alternatives to recipes is fun! For instance, take this blueberry cheesecake recipe. The one I found on line called for store-bought canned blueberries. I have blueberries in the freezer I want to use. The crust called for graham crackers. I didn't have any of those and have since read the ingredients in the ones from the store. When I make blueberry pie, I use tapioca, not cornstarch. So, I played.
Graham cracker crust.
        Without having to make the graham crackers, this is really a simple recipe, but since I didn’t have the crackers and my husband suggested, tongue in cheek, that I could make my own, that is what I did. The recipe I found is from Nancy Silverton’s book Pastries from the La Brea Bakery (Villard, 2000). The first time I read it through I found it kind of daunting, but it’s really the same as any other rolled and cut-out cookie recipe. The only change I made to ingredients is to substitute some of my homemade brown sugar to use along with light brown store-bought, but I altered the technique, choosing to mix by hand rather than using a food processor.

Graham Cracker recipe

2 ½ cups plus 2 tablespoons unbleached all-purpose flour
1 cup dark brown sugar, lightly packed
1 teaspoon baking soda
3/4 teaspoon kosher salt (I used regular salt)
7 tablespoons unsalted butter (okay, so I lied. I changed this too, and used salted butter because that’s what I have on hand.)
1/3 cup mild-flavored honey
5 tablespoons whole milk
2 tablespoons pure vanilla extract

The topping, mix and set aside:

3 tablespoons granulated sugar
1 teaspoon ground cinnamon
Cinnamon sprinkled over cheese layer.
        In a large bowl mix the flour, brown sugar, salt and soda. Cut the butter into small pieces and use a pastry knife to cut it into the mixture until the mixture looks like a course meal.
        In a small bowl, whisk together honey, milk, and vanilla. Stir this into the flour mixture. Turn the soft, sticky dough onto a lightly floured work surface. Pat it into a rectangle about an inch thick. Wrap it in plastic and chill for two hours or overnight.
        Work with half the dough at a time, keeping the second half refrigerated until needed. Roll the dough to 1/8 inch thickness on a floured surface. Trim the edges to make a rectangle 4 ½ inches wide. Cut the dough at 4 ½ inch intervals. Move the crackers to a parchment-lined cookie sheet and sprinkle with the topping. Repeat with the second half and with the trimmings. Chill for 30 to 45 minutes. Cut part way through the crackers down the middle. Use a toothpick to prick the dough at ½ inch intervals in two rows on each side of this cut.
       Bake in preheated oven at 350 degrees until the crackers are browned and slightly firm to the touch. Rotate the sheets halfway through baking for even cooking. (The recipe I copied says to bake for 25 minutes. This may be a printing error. It was much too long. I’m only made this once so far, but 15 minutes sounds more reasonable. Watch yours closely to prevent overcooking!)
       Makes about 10 4-1/4 squares.

Blueberry Cheesecake

Crust: 1 1/4 cup graham cracker crumbs
           1/4 cup sugar
            ½ cup butter, softened

Cheesecake:  2 eggs
                      ½ cups sugar
                      1 pkg (8 oz) cream cheese, softened
                      1 teaspoon vanilla
                      Ground cinnamon

Topping:       1/4 cup tapioca (original recipe: 2 T cornstarch)
                      ½ cup sugar            
                      4 cups frozen blueberries (or a 15 oz can from the store)
                      2 tablespoons lemon juice
The finished cheesecake on its way to being gone!
                      Sweetened whipped cream (optional, apply at serving time)
         Mix topping ingredients and press evenly in bottom of ungreased 9 x 9 x 2 pan. (I used an 8x8.
        Beat eggs until thick and light-colored. Beat in ½ cup sugar, cream cheese, and vanilla until smooth. Pour over crust and bake 30 minutes at 300 degrees. Sprinkle cinnamon evenly over top. Cool completely before adding berry topping.
        Mix the blueberries (frozen or thawed) with sugar, tapioca and lemon juice in a saucepan. Heat slowly, stirring often until the juices flow. Bring to boil and boil gently for about five minutes. Cool. Pour over cheese mixture and return to refrigerator to cool completely. 9 to 12 servings.
        The original directions say to chill for at least 8 hours. I take this to mean the cheesecake portion, not the finished dessert after the addition of the blueberries.
       In playing, I can make an otherwise simple recipe complicated. If you prefer simple, open a 21 oz can of blueberry pie filling and stir in 2 tablespoons of lemon juice, heat and pour over the cheese layer. If you prefer cornstarch with frozen berries, you may have to mix it with water and heat it before adding the blueberries.
       In my opinion this was worth the extra effort, and it all started when I asked my oldest grandson what dessert he would like if he could have anything he wanted. Answer? A huge blueberry cheesecake.

Tuesday, January 10, 2012

Contest! Drawing February 14 (CLOSED)

CONTEST CLOSED  

       For my first ever contest on this blog, I will be offering two items: a star-patterned quilting block measuring 12-1/4 inches square and a handmade paper mache Kume mask made of 100% junk mail. The quilting block is one that did not make it into my star quilt because I failed to measure as I sewed and it wound up a quarter inch smaller than the other blocks. The mask is a jolly goddess from traditional Japanese theater, and is a wall hanging measuring about ten inches tall. There will be two drawings. The first winner will have a choice of the two items.
       To enter the drawing, "like" my wall page and comment on any of the webpage posts ON THE WEBSITE at http://lawnlesstrials.blogspot.com  the duration of this contest. It can be an old post, but the comment must be on the website as all those comments are tracked for me in one place so I won't have to search out every name myself. The first winner will be announced February 14 and she'll need to make her selection and send me contact information. Then I can announce the second winner and which prize remains.
       My goal with this contest is to increase the number of people reading my posts and to increase interaction with those people. If this goes well, I'll have more contests, so comment and please spread the word!
        Mailing address for the prize recipients must be in the USA.
       My husband and some readers tell me that they think this mask is creepy. Sooo, as an alternative second prize I could offer some dried flowers or herbs but all I have on hand are from 2010. Would this be more appealing?
       One entry per comment on any one post, but you can comment on more than one post for more chances to win.

Sugar Beets to Molasses, Homestead Style

       This experiment found its inspiration many years ago when my husband was a youngster. He found a sugar beet along the side of the road near his family farm (where we live now, in fact) and took it home. His mom took one look at the thing and declared that there wasn’t enough beet to do anything with. The poor thing shriveled away and was eventually tossed out.     
       Fast forward to spring 2011. Riley ordered sugar beet seeds through a catalog and told me this story. The catalog (Richter’s) provided tentative directions for processing sugar beets at home.
Sugar beets, from the garden, ready to
chop, ready for the stock pot
       Reading those directions made it clear that the company was offering the directions they had gleaned from some 4H source and that the company had not tried the directions, which were said to produce a cup of white sugar and half a cup of molasses from two 8-10 pounds of sugar beets. To follow this "recipe" you need seltzer water and milk of lime, also known as calcium hydroxide. I have a seltzer bottle and found recharging canisters for it in the sporting department of a big department store. Sporting department? Apparently they are used somehow with paint balls. Milk of lime presents a larger problem. First of all, it is not milk, has nothing to do with the fruit, and is not a food supplements. This is the mineral farmers use to sweeten their fields. My favorite pharmacy has tried to order it without success. My husband found it online, but hasn’t ordered it yet. The smallest package he found was five pounds. While it isn’t expensive, this is a huge amount. Added to that are the warnings he found about the fine powder hanging in the air and the stuff’s violent reaction to water. If I can get my hands on milk of lime, I’ll probably experiment with it–outside, upwind.
In the pot and in a cloth-lined strainer
        In the meantime, I have found directions for processing sugar beets at home much like a homesteader might have done near the end of the nineteenth century. It wasn’t until late in that century that sugar beets became popular as a source of sugar. The first commercial sugar beets processing plant in the USA wasn’t opened until 1879 or thereabouts.
       Modern sugar beets have been modified so that they have smoother surfaces and, therefore, less crevices to catch dirt, which is washed off mechanically in the commercial plants. If I read my sources correctly, modifications also include a nice tapered shape, like a fat turnip, with a single root, multiple roots being undesirable for the same reason as creases. A few of the sugar beets I grew had this nice shape. They all sported crevices and many had several roots. My biggest were under five pounds. Most ranged between three and four pounds. Four or five of these will probably be enough to fill a sixteen quart stock pot, depending on how ruthless you are in preparing the beets for cooking.
Sugar beet syrup still hot from cooking.
       Sugar beets and the red beets we are more familiar with come form a common ancestor, but sugar beets take longer to mature. They should be plucked from the ground before a freeze, and can be stored for weeks if necessary before processing. Standard practice appears to be to knock beets together to remove excess dirt at harvest time. The commercial plants here in Michigan run 24/7 from harvest and into February, but my crop was already showing aging signs in December, so I was not comfortable with leaving them unprocessed any longer.
        To get started, scrub the beets to remove any remaining dirt. Keep in mind that there will be more of this than you want to go down your drain. I used a small scrub brush. Cut off tops and anything else you don’t like the looks of. I cut away green beet meat, places where dirt could still be hiding and the top center where it looked like insects may have taken up residence. In doing this, I disturbed a few silverfish and one very large black spider.
        Prepare the beets to go through whatever mechanical device you have to grind, chop, or sliver the beets, or chop/slice with a knife. For what I used, chunks worked best, and they went though my slicer much easier when peeled. I peeled after cutting the beets into chunks. Much easier.
       Sugar beets are as tasty and edible to people as red beets. If you plan to can or freeze these, I suggest you prepare two pots, one with clean white, uniformly sliced beets, the other with everything else. I found no canning directions for sugar beets, but see no reason why instructions for red beets would be any different. The Ball Blue Book is the best reference for canning procedures.
       Fill you stock pot with beets barely covered with water, but leave room for expansion and stirring. Bring to a boil and cook until mushy (or tender if you are saving the beets). Stir frequently. Directions say an hour will suffice, but I don’t think there’s such a thing as overcooking these, unless you are going to save the beets for people food. It’s the sugar water that you process for molasses and sugar. Commercially, the beets themselves are sold as stock food.. At this point the mass in your pot won’t look very appetizing, more like something for a paper mache project than food.
Sugar Beet syrup starting crystallization process.
      Once the beets are soft, separate the beets and water. I dump a few cups’ worth into a cloth-lined strainer and squeeze out as much liquid as possible. Pre-wet the cloth. The liquid resembles a weak tea. A taste at this point will convince you there is sugar in the liquid! This must be cooked down until it’s thick like honey. Cook over low to medium heat, stirring frequently. When it goes to a full rolling boil like you get when you make jelly, you know you are close to being finished. This is the point where you want to watch it closely so you don’t spoil your product by burning it. You may start with four or more quarts of tea from one stock pot of beets, but you will end up with two or three cups, at most, of syrup.
       If you process one stock pot full after another, use the same water more than once to save cook–down time.
       Cool it some before you transfer your syrup to a storage container. I suggest you use something that will allow you access while the crystallization process progresses. I’m using Corelle dishes with lids. A wide-mouthed canning jar would be perfect. The crystallization process could be a long one, as my directions compare it with honey crystallization. My directions say that the sugar will form clumps that you will want to break up periodically. Your main problem with this waiting period may be using the syrup for cooking, on pancakes, spread on bread, or used as a honey substitute so that it’s gone before the process is complete. If you want to hurry the process, you can try cooking it down further.
       More than a month after rendering the last of my 82 pounds of sugar beets, I have three syrup batches (less than three quarts) prepared at different times and now at different stages of crystallization. From the first batch I have a little almost pure sugar, still moister than the brown sugar you find in the store. (Do you know that the brown sugar you buy is processed to the white stage, then molasses is added to make it brown again?) Some of the other batches has reached a point where the syrup is too thick with sugar to pour, but there is no separation of crystallized sugar and molasses. This is something I haven't figured out how to do. During the commercial process, seltzer and the milk of lime are added to settle out impurities (chemicals, not dirt) that interfere with crystallization. The Richters directions say to use an orange juicer and percolator top to separate the two with a spinning action. I don't have these. I tried using a regular juicer without success.
       I continue to experiment with using both the brown sugar and molasses in cooking and love the results I've had, but you will have noticed by now that this is a great deal of work for little return. Remember I started with over eighty pounds of beets. While the beets themselves are edible, the only way I really like beets is pickled, for which I prefer red beets. Only you can decide if all this is worth the effort, but you may want to give it a try as an experiment. Knowing how to process this sweetener could come in handy if, for some reason, you could no longer buy sugar at the grocery store. Then again, if you do it yourself, you know exactly what the product came in contact with during the process. Sometimes, in reading about commercial shortcuts, you learn more than you want to know.

Mouse Problem?

        Have you ever heard anyone say they have a mouse problem? They almost certainly mean that these cute little critters have invaded their home space, leaving not so cute little black droppings in cupboards or in the silverware drawer. Yuck! Experience tells me that if you know there is one mouse in your house, you have many more.
       Every fall we have an invasion in our country home. Usually by this time of year the problem has been resolved through the use of traps. This year has been different. They didn't appear until a month or two later than usual and I'm still battling the hordes. So far I've eliminated about one and a half dozen of the little beasties. It's been a few days since I've seen evidence that they are still around, but with the continuing mild weather here in Michigan, I'm not convinced they have stopped moving around looking for their winter hang out so the traps are still set and baited.
Three mouse traps. The d-Con does not work for me.
The other two are adjustable and catch mice.
       If you share this problem, you might be interested to know what works for me in catching these little monsters. I have had no luck whatever with live traps that are supposed to entice the mice to enter to eat the bait and then cannot get back out. If I caught a mouse with one of these, I'd want to kill it anyway. Sorry, but where mice are concerned, I'm not a catch and release person. I will not use poisons. Traps that catch mice and hold them until you get around to checking them seem cruel and not terribly reliable. I use the old-fashioned traps that break the neck quickly and cleanly--usually. There are several of these on the market. One purports to be self-baited with a little yellow spring board that's supposed to look like cheese. I don't know what scent or flavor this type has, but in my experience it doesn't work. I don't recall ever catching a rodent with one of these. Further, if there is no visible bait, how do you tell if something has come around and eaten it and gotten away? If you think you can tell because the trap will have sprung because the mouse licked the "cheese" then you have more faith in the product than I do.
        Next time you want to catch a mouse, set the trap and touch the place where you place the bait with a stick or screwdriver. See how much pressure it takes to spring the thing. You'll be surprised at how much it takes. The good news is that with the Mouse Guard and Victor traps, you can adjust the pressure to hair trigger and actually get the little buggers when they are lapping up the bait. I use needle-nosed pliers to squeeze the metal protrusion that holds the wire that holds the killing mechanism. If you squeeze too much and can't get the wire to hold, adjust it the other way using the same tool. Don't use cheese for bait! Peanut butter is a much better choice, and it sticks very nicely to the trap.
       If you don't have a mouse problem, good for you! If you do, good "hunting."